|
|
|
|

|
David Rankin
Watercolor Workshop
Birds in Watercolor I
Euclid Art Association
May 31 -
June 2, 2019
|
If you want to paint
birds better, you have to draw birds better. David explained
that the skills learned in this workshop will not only improve how
we paint birds, but everything we paint. We started our
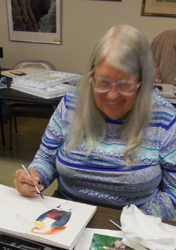
workshop on Friday evening by gathering around David to watch him
sketch. In addition to learning sketching techniques, a core
skill, we learned kissed edge blends and a lot more!
Theres nothing like kissed edge blends in oils and acrylic!, he
quipped. Before David ever commits paint to his good Arches
rough paper, he will first do several sketches, then a gray study
and/or color study, all in his sketchbook. Thats the way I
work!
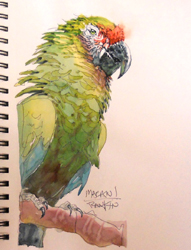
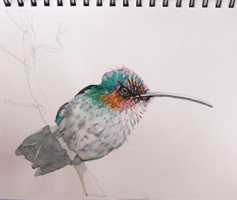
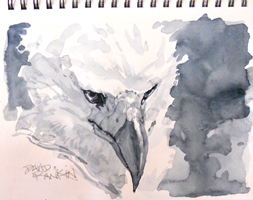
Samples from
David's sketchbooks
David is known to
sketch using a black ball point pen or 9B woodless graphite pencil.
In this class he recommended a 2B pencil, because its easy to erase
the lines. I dont care if you cant draw, he said.
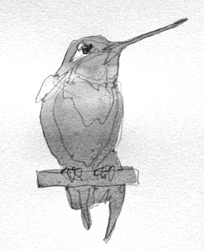
Most of us have to unlearn how we draw, anyway. His core
sketching technique is called Stop, Look, Go. He asked us
where would you start to sketch a bird? The right answer.... the
beak. Then look for the shape to attach to the beak.
Assemble the bird sketch like a puzzle and dont lift your pencil
off the paper. If you position the beak correctly and at the
right angle, the rest of the bird falls into place.
Tips....remember you are drawing lines around shapes; bird legs are
done in 2 pieces; pay attention to the eye, a reflection is
critical.
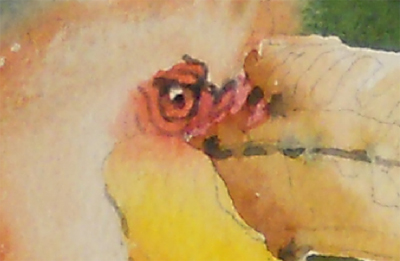
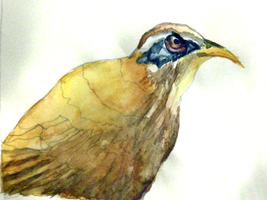
We spent a lot of time learning how to paint the birds eye.
Paint the entire eye in the first wash....remembering to leave a
reflection! Most of us did not do this. Reaching for
the white paint, is NOT the skill. As an example, for one of
the birds we started with a wash of burnt sienna, developed the eye
using Paynes gray as the near darkest dark, darkened a little in
the upper corners, dropped alizarin crimson around the eye and added
neutral tint, as the darkest dark. Tip....work flat, no
gravity. [See pictures.]
 David
reminded us that a photograph always compresses color. Thus,
making an image look flat. In watercolor, if you put the
darkest dark in two planes, you flatten your painting. Develop
values and depth in your painting by using a near darkest dark
first, then the darkest dark. Also, anything with a soft or
blended edge is painted in the 1st layer. Before starting the
2nd layer, erase the pencil lines. Sharp edges are in the next
layer. A rule of thumb...to develop depth, combine soft edges
with hard edges. David
reminded us that a photograph always compresses color. Thus,
making an image look flat. In watercolor, if you put the
darkest dark in two planes, you flatten your painting. Develop
values and depth in your painting by using a near darkest dark
first, then the darkest dark. Also, anything with a soft or
blended edge is painted in the 1st layer. Before starting the
2nd layer, erase the pencil lines. Sharp edges are in the next
layer. A rule of thumb...to develop depth, combine soft edges
with hard edges.
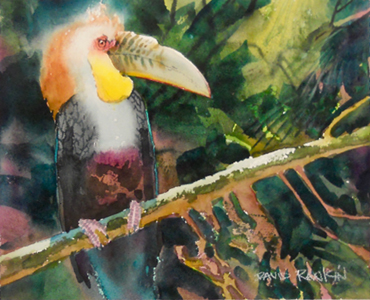
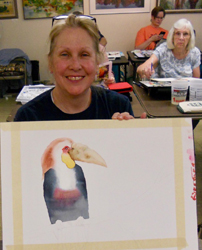
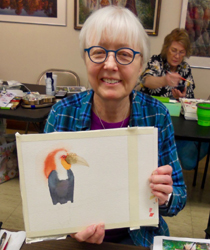
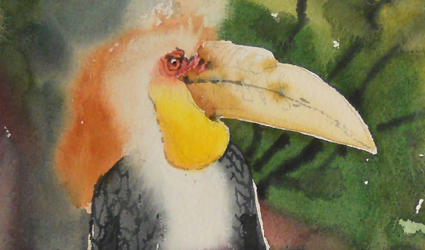
We practiced kissed edge blends and creating soft edges as we
painted the Great Horn Bill. His beak was hard edged and the
top of his head, soft. Using gravity and two large brushes, we
started with burnt sienna and a touch of cadmium red for his head,
softening both sides with a brush of clean water. Dabbing with
a paper towel helped keep the soft edge. Notice the blends and
softness around his head, eye, on the beak, chest and of course, in
the background.
Click here to see the step-by-step process of painting the Great
Horn Bill.
A word about background....darker than the main bird, but not as
dark as the darkest part of the face. We learned several
techniques. One, a glisten....wet the background with water
and drop in Hooker's green, burnt sienna and some permanent rose.
Second, the fun way, which we did on the painting of the Great
Horn Bill. Get all your colors ready in advance. We used
permanent rose, alizarin crimson, and/or Bengal rose...all colors
that love Hooker's green...and Paynes gray. Drop colors in
the background using kissed edge blends. Leave some white
sparkle and white around the bird to drop in spice colors at the
end, like Winsor green blue shade, and bright chartreuse green.
Work fast and be expressive. While damp, add a few branches
that will soften into the background.
Click here to see the step-by-step process of adding background
behind the Great Horn Bill.
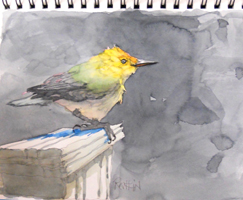
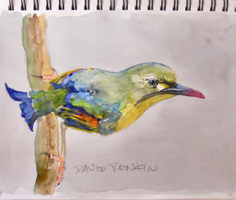
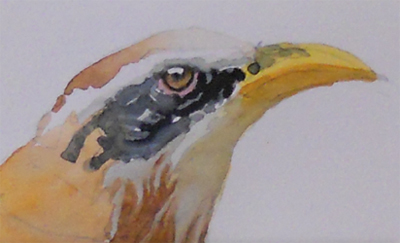
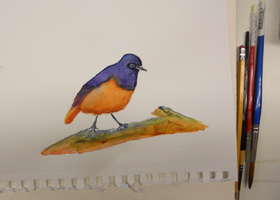
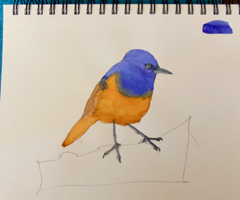
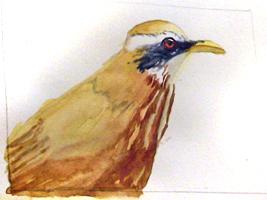
We started by sketching and painting a bright purple and orange
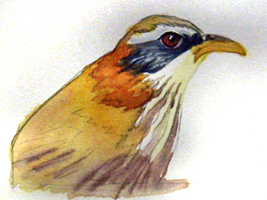
round little bird. Then, an orange-brown bird with distinct
markings, eye and bright beak.
Click here to see the step-by-step painting of the orange-brown
bird. We sketched several birds in our sketchbook and finished
a painting on Arches rough paper of the Great Horn Bill. Enjoy
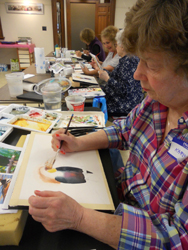
these pictures from the workshop.
Student paintings of the purple and orange bird...
Student paintings
of the orange-brown bird...
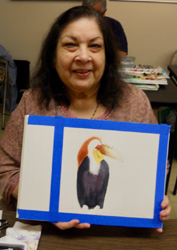
Student paintings
of the Great Horn Bill bird...
|