|
|
|
|
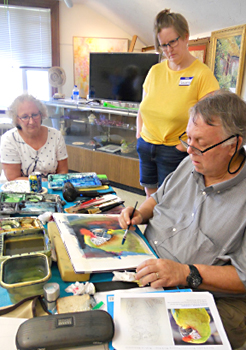
David Rankin
Watercolor Workshop
Birds in Watercolor II
Euclid Art Association
June
28-29-30, 2019 |

|
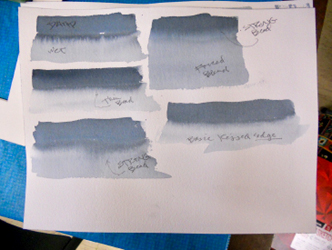
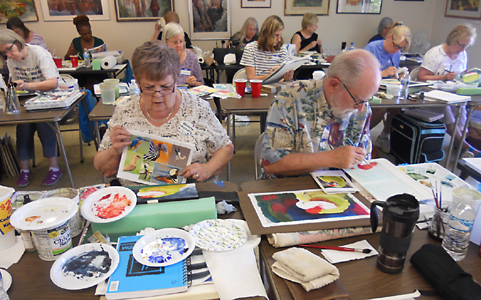
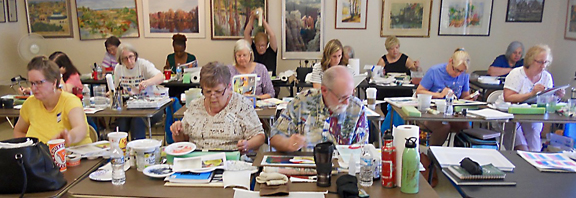
Our Birds in Watercolor II weekend workshop
with artist, David Rankin ended on Sunday, June 30. On
Friday evening we concentrated on learning kissed edge blends in
detail, a skill we later used in painting our birds. According
to David, this is an extremely simple procedure, but incredibly
hard to do. Practice, he said, as this is the money
skill.
Davids handout contains an excellent description of how to execute
basic kissed edge blends. [click
here to see kissed-edge technique] We experimented with a
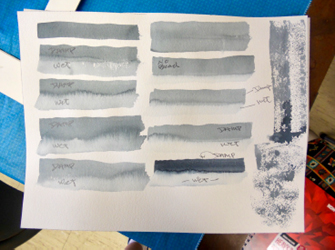
thin bead, a strong bead, a really fat bead and no bead. What
is a bead, you ask? Its explained in Davids handout!
Using two inches of gravity, barely touch, kiss, the bottom edge
of the gravity bead with the tip edge of the brush....do it one
time, dont go back and forth and no scrubbing! When you are
painting without a bead, and your second brush stroke is wetter than
the first brush stroke, which is still damp, capillary action
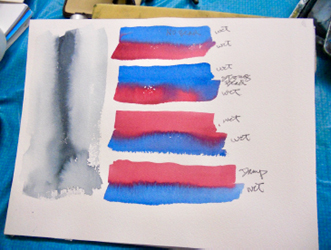
results.... sometimes called a happy accident or a blossom. We
used this blossom technique to create an interesting effect for
the red feather topknot on our Military Macaw...some of us were much
more successful than others. This is a skill that needs
practice.
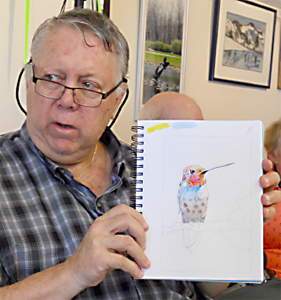
 On
Saturday, we learned how to draw birds. David said, the
ability as an artist to look at something and draw it is utter
magic. See shapes, draw shapes and do it on a regular
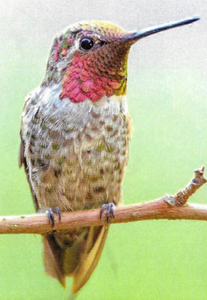
basis. We started with the ruby throated hummingbird using
Davids stop, look, go sketching technique. The trick
is to start with the beak and then draw the attached head shapes.
Tip: never start the sketch with the tip of the beak, but
where it emerges from the head. Sketch shapes...the
forehead, top, then under the beak. Now add the body and the
tree limb....not the tootsies, yet. Next, place the eye;
draw shapes around the eye; remember the reflection! Draw some
lines of feathers on the cone shape under the beak. Draw the
birds toes & feet...it has three toes. Give the branch some
character and then add the birds tail. Next, add a light
drawing to define shapes of feathers on the belly. The classic
drawing technique learned in art school needs to be unlearned.
Drawing numerous lines around a shape is a no-no! Draw shapes
with one single line and dont take more than 10 - 15 minutes to
complete your sketch.
Click here to see step-by-step photos of David sketching the
hummingbird. On
Saturday, we learned how to draw birds. David said, the
ability as an artist to look at something and draw it is utter
magic. See shapes, draw shapes and do it on a regular
basis. We started with the ruby throated hummingbird using
Davids stop, look, go sketching technique. The trick
is to start with the beak and then draw the attached head shapes.
Tip: never start the sketch with the tip of the beak, but
where it emerges from the head. Sketch shapes...the
forehead, top, then under the beak. Now add the body and the
tree limb....not the tootsies, yet. Next, place the eye;
draw shapes around the eye; remember the reflection! Draw some
lines of feathers on the cone shape under the beak. Draw the
birds toes & feet...it has three toes. Give the branch some
character and then add the birds tail. Next, add a light
drawing to define shapes of feathers on the belly. The classic
drawing technique learned in art school needs to be unlearned.
Drawing numerous lines around a shape is a no-no! Draw shapes
with one single line and dont take more than 10 - 15 minutes to
complete your sketch.
Click here to see step-by-step photos of David sketching the
hummingbird.
 Next,
we painted the bird in our sketchbook. Shifting into a
different skill set, we focused on kissed edge blends, starting with
the head shape. Once you start a wet blend, keep it going,
David said. So, get your palette ready and use gravity!
For the birds head, we used permanent rose, alizarin crimson, burnt
sienna, a warm yellow/orange, burnt umber, and Paynes gray.
Eye trick...paint over entire eye with Paynes gray, leaving white
for the reflection...no masking! When dry, paint in a dark
center of the eye. At this point, everything is middle value,
except for the center of the eye. Next,
we painted the bird in our sketchbook. Shifting into a
different skill set, we focused on kissed edge blends, starting with
the head shape. Once you start a wet blend, keep it going,
David said. So, get your palette ready and use gravity!
For the birds head, we used permanent rose, alizarin crimson, burnt
sienna, a warm yellow/orange, burnt umber, and Paynes gray.
Eye trick...paint over entire eye with Paynes gray, leaving white
for the reflection...no masking! When dry, paint in a dark
center of the eye. At this point, everything is middle value,
except for the center of the eye.
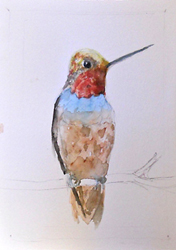
For the body of
the bird, David had us consider the light source and suggested we
put a directional sun on the paper outside the painted area.
The blue tone on the body is reflected light from the sky. We
started with the reflected light shadow on the birds chest using
intense blue, kissing the edge with clean water and tapping more
blue pigment where the shadow starts.
Click here to see step by step photos of David painting the body
and background.
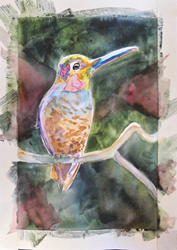
 Background
was added next. Tape it off, first. We used a
combination of brush strokes...kissed edge and cutting strokes
[Click
here for brush stroke definitions]. David wanted to focus
the attention on the birds head and shoulder area, with the
intention of keeping the forward edge of the bird sharp and the back
softened. Load a 1 wash brush with Paynes gray, Hookers
green and burnt sienna; paint a sharp edge along the body of the
bird and run the paint away from the edge, leaving a very thin line
of white on the front edge, around the tail and under the beak; add
some alizarin crimson in the background. Lay your paper flat
and let it dry. Tip: remove tape as soon as painting is
dry; pull the tape vertically toward you and always away from the
painting. Background
was added next. Tape it off, first. We used a
combination of brush strokes...kissed edge and cutting strokes
[Click
here for brush stroke definitions]. David wanted to focus
the attention on the birds head and shoulder area, with the
intention of keeping the forward edge of the bird sharp and the back
softened. Load a 1 wash brush with Paynes gray, Hookers
green and burnt sienna; paint a sharp edge along the body of the
bird and run the paint away from the edge, leaving a very thin line
of white on the front edge, around the tail and under the beak; add
some alizarin crimson in the background. Lay your paper flat
and let it dry. Tip: remove tape as soon as painting is
dry; pull the tape vertically toward you and always away from the
painting.
Next we painted the limb and branches. Remember the
direction of light on the branch. Making it round is easy,
per David. Using his paint into wet technique, first put down
clean water over the branch and take away most of the water with a
dry brush. Then, use the rigger brush with Paynes gray and
burnt umber down the center of the branch; while still wet kiss the
bottom edge of the rigger stroke with a yellow for the reflected
light. Next add a cast shadow of intense blue on the branch
under and to the left of the bird. Then add a spice color of a
weak permanent rose as reflected light under the beak.
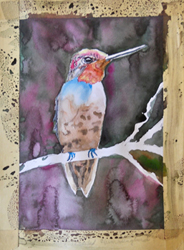
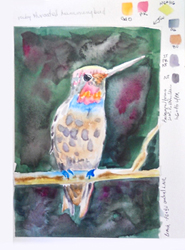
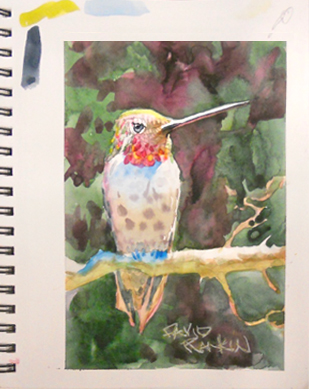
 On
Sunday morning, David showed us how he further detailed his
hummingbird. In a small painting, use BIG painting charm!
Use a not too heavy permanent rose and a wide brush, paint along
the back edge of the bird, followed by a kissed edge of clean water
down the whole bird...use a light touch. Getting the right
touch takes practice! This helped round the bird even more.
David also pinked the tail, i.e., added a light wash of permanent
rose over specific parts of the tail; darkened the toes; added
toenails; added a reflected blue on the upper part of the beak, left
a thin line of white at the top of the beak and added more cast
shadows over the limbs on the right (not shown in this picture).
These added touches are what David calls, CHARM. Tip:
permanent rose as a spice color works well with other colors to
brighten and spice up the palette. On
Sunday morning, David showed us how he further detailed his
hummingbird. In a small painting, use BIG painting charm!
Use a not too heavy permanent rose and a wide brush, paint along
the back edge of the bird, followed by a kissed edge of clean water
down the whole bird...use a light touch. Getting the right
touch takes practice! This helped round the bird even more.
David also pinked the tail, i.e., added a light wash of permanent
rose over specific parts of the tail; darkened the toes; added
toenails; added a reflected blue on the upper part of the beak, left
a thin line of white at the top of the beak and added more cast
shadows over the limbs on the right (not shown in this picture).
These added touches are what David calls, CHARM. Tip:
permanent rose as a spice color works well with other colors to
brighten and spice up the palette.
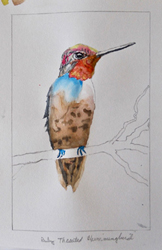
Hummingbirds painted in class
Before moving on to the Military Macaw, we got a lesson in using
the doctor brush to soften hard edges. The doctor brush is a
very stiff brush, typically a Chinese bristle brush, thats used to
carefully soften edges using clean water. Hard edges happen,
according to David, when you were messing around elsewhere and it
dried.
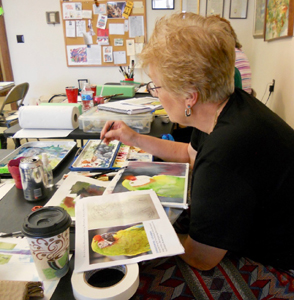
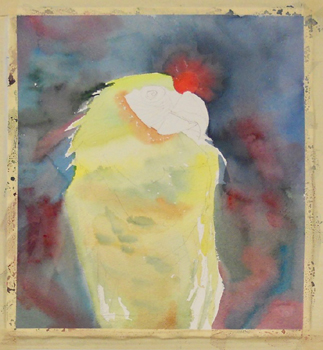
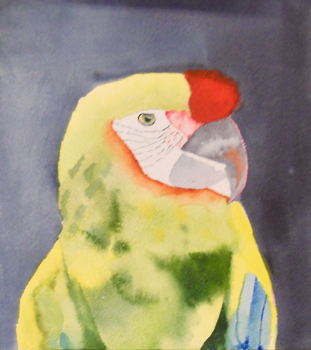
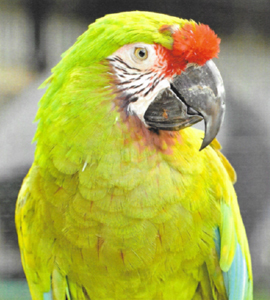 David
chose the Military Macaw because of the nice blends, especially the
burnt sienna into the green under the beak. David said there
were three things we would focus on....the wash over the body with
several colors, the magnificent beak, and the red feathers on the
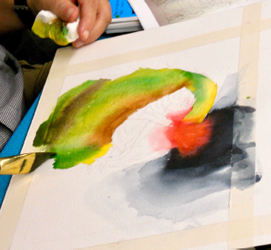
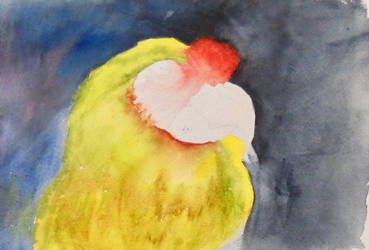
top of the head. The first thing we concentrated on was the
red feather topknot. We got our paint colors ready....cadmium
orange and permanent rose makes a good red, and P David
chose the Military Macaw because of the nice blends, especially the
burnt sienna into the green under the beak. David said there
were three things we would focus on....the wash over the body with
several colors, the magnificent beak, and the red feathers on the
top of the head. The first thing we concentrated on was the
red feather topknot. We got our paint colors ready....cadmium
orange and permanent rose makes a good red, and P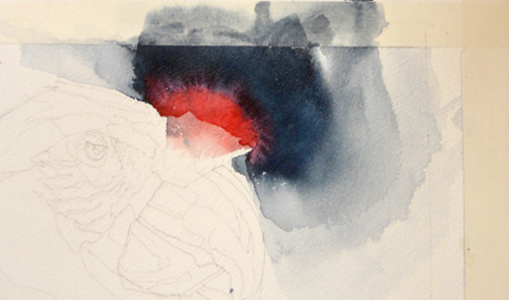 aynes
gray. The goal was to create a unique effect of
capillary action, creating a feathery topknot. First, put a
strong background of Paynes gray around the head....feather out the
background pigment using clean water. At the right moment,
i.e., when the dark pigment is still damp but not wet, kiss the edge
of the Paynes gray with a not too soppy wet red pigment and
lightly nudge it into dark background. Wait and watch and hope
the capillary action works. It takes some practice. Some
of us ended up using the doctor brush to soften the edge between the
dark and red colors. Key point to remember: two wets blend; one
damp & one wet create capillary action. You can re-wet to make
it damp. In capillary action, wet is drawn into the damp;
think of how a damp sponge draws water off the counter into the
sponge.
Click here to see photos of David painting the body and
background. aynes
gray. The goal was to create a unique effect of
capillary action, creating a feathery topknot. First, put a
strong background of Paynes gray around the head....feather out the
background pigment using clean water. At the right moment,
i.e., when the dark pigment is still damp but not wet, kiss the edge
of the Paynes gray with a not too soppy wet red pigment and
lightly nudge it into dark background. Wait and watch and hope
the capillary action works. It takes some practice. Some
of us ended up using the doctor brush to soften the edge between the
dark and red colors. Key point to remember: two wets blend; one
damp & one wet create capillary action. You can re-wet to make
it damp. In capillary action, wet is drawn into the damp;
think of how a damp sponge draws water off the counter into the
sponge.
Click here to see photos of David painting the body and
background.
Another lesson before moving on, the RULE. There are three
planes of depth: foreground, middle ground and far distances.
Never put a dominant dark in two planes as this flattens the
painting. David takes every subject apart and analyzes this.
Ask yourself this: 1). Where is the lightest, brightest, whitest
part of the subject? 2). Where are the darkest darks?
This is what David calls Watercolor Vision.
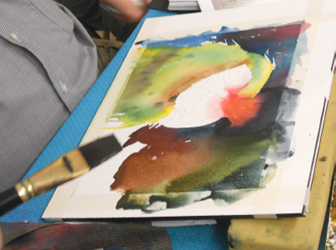
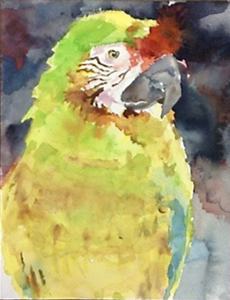
The next step is pure fun because of the blends. Get your
paint colors ready....yellow, cadmium yellow, or Indian yellow; a
yellow green; a green; old Hookers green; Paynes gray; burnt
umber. Use the 1 wash brush and gravity.
Start at
the top of the head with a bright yellow, followed by green; use a
broken stroke [Click
here for brush stroke definitions] around the eye mask.
Notice the darker color under the mask and beak; put a broken stroke
of burnt umber & burnt sienna then kiss that edge with clean water.
Continue on with green, then yellow. Brush in some burnt umber
and more green. Then, drop in some soft feathers using Paynes
gray. Leave the bright blue on the lower feathers, white, as
seen in the reference. This will be painted later. Dont
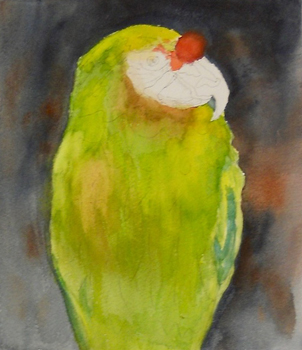
wait for the bird to dry. Continue on with the background of
Paynes gray, alizarin crimson, some dark green and blue. On
the left edge, we want the bird to merge into the background.
So, first use clean water then kiss the edge with intense blue.
As you continue to paint the background, cut in some feathers on top
and both sides of the bird and leave some sparkle.
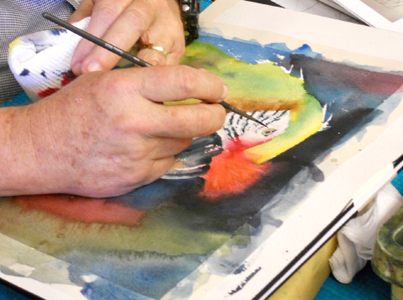
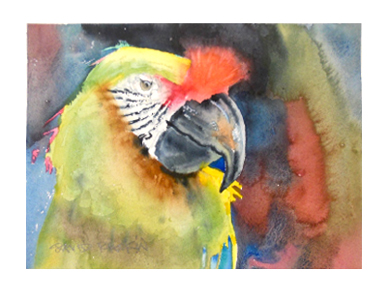
Last stage before
class ended: David put definition into the face, starting with the
beak. He wanted to build roundness in the beak by using soft
edges and broken strokes, merging Paynes gray, brown and pink with
clear water. Dont overwork it. Some of the face
markings are soft and some hard. Drop in the soft markings
first. Then, using a rigger or 1/4 brush, place broken stroke
of Paynes gray over the soft.
Click here to see step by step photos of David painting the beak
and face.
  For
the eye, paint the entire eye a pale yellow-green, leaving the
highlight. Outline around the eye with Paynes gray and paint
the pupil. Put neutral tint in the eye corners and push up
into the corners with a clean wet brush.... these small things add
a lot! Put a very weak blue into the eye reflection.
The pupil still needs a near darkest dark. Use neutral
tint...take water away with paper towel...and darken the pupil with
this darkest dark. More detailing is needed around the eye.
David used the rigger and drew with it lightly around the eye. For
the eye, paint the entire eye a pale yellow-green, leaving the
highlight. Outline around the eye with Paynes gray and paint
the pupil. Put neutral tint in the eye corners and push up
into the corners with a clean wet brush.... these small things add
a lot! Put a very weak blue into the eye reflection.
The pupil still needs a near darkest dark. Use neutral
tint...take water away with paper towel...and darken the pupil with
this darkest dark. More detailing is needed around the eye.
David used the rigger and drew with it lightly around the eye.
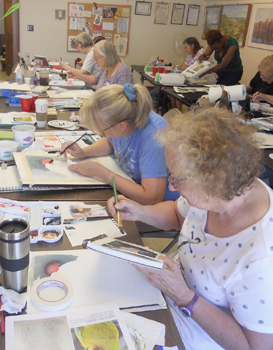
The class was made up of watercolorists from NJ, KY, and all over
northeast Ohio. Everyone agreed that David is an excellent
teacher. Thank you, David, for another amazing workshop!
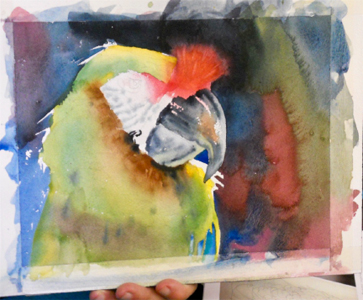
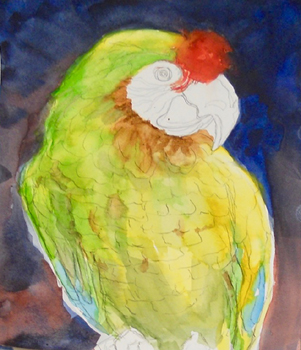
Macaws painted in class
|